
Whether you need to change a flat tire in the middle of nowhere or you’re swapping out your winter wheels and tires when spring rolls around, the ability to change a tire is a handy skill that every driver should master. Thankfully, like pumping your own gas or checking your engine oil, the process is simple and easy to learn.
It should be noted that many newer cars come from the factory with tire sealant kits instead of a traditional spare tire and wheel. Check your owner’s manual or consult your dealer to determine which applies to your vehicle.
1. Safety First
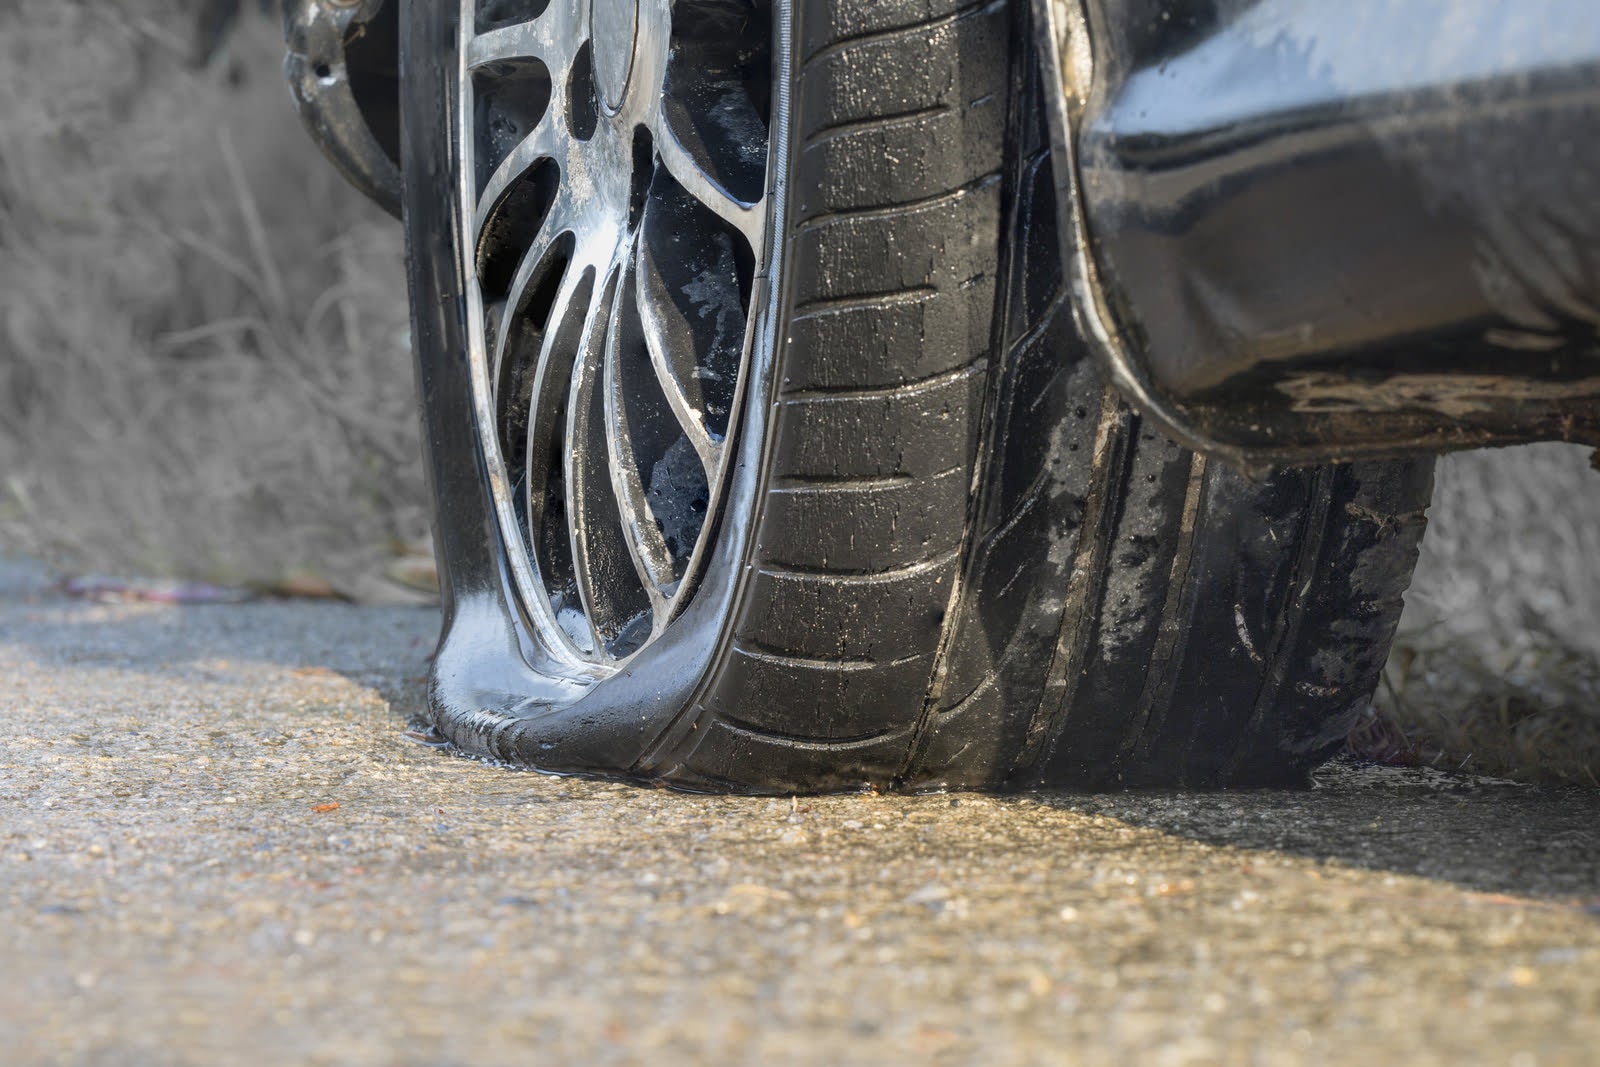
Regardless of where you’ll be changing a tire (or tires), make sure it’s a safe spot. If you find yourself with a flat tire while traveling, you’ll ideally be able to pull into a large, flat parking lot. However, if that’s not possible, park as far off to the side of the road as possible to avoid the dangers of passing traffic. For times like these, it’s always a good idea to carry an emergency kit with flares or reflective safety markers to help other drivers see and avoid you. And don’t forget to turn on your hazard lights any time you find yourself stuck with a disabled vehicle.
Next, you’ll want to be sure the vehicle is in Park (if equipped with an automatic transmission), the parking brake is engaged, and you’ve chocked the wheel diagonal to the wheel being removed. For example, if you’ll be changing the right front tire, place a chock behind the left rear tire to prevent the car from possibly moving or rolling. An inexpensive chock can be purchased from any auto parts store and kept in your emergency kit, or, if need be, use a large rock or piece of wood (whatever you can find nearby) to serve as a makeshift chock.
2. Use the Right Tools
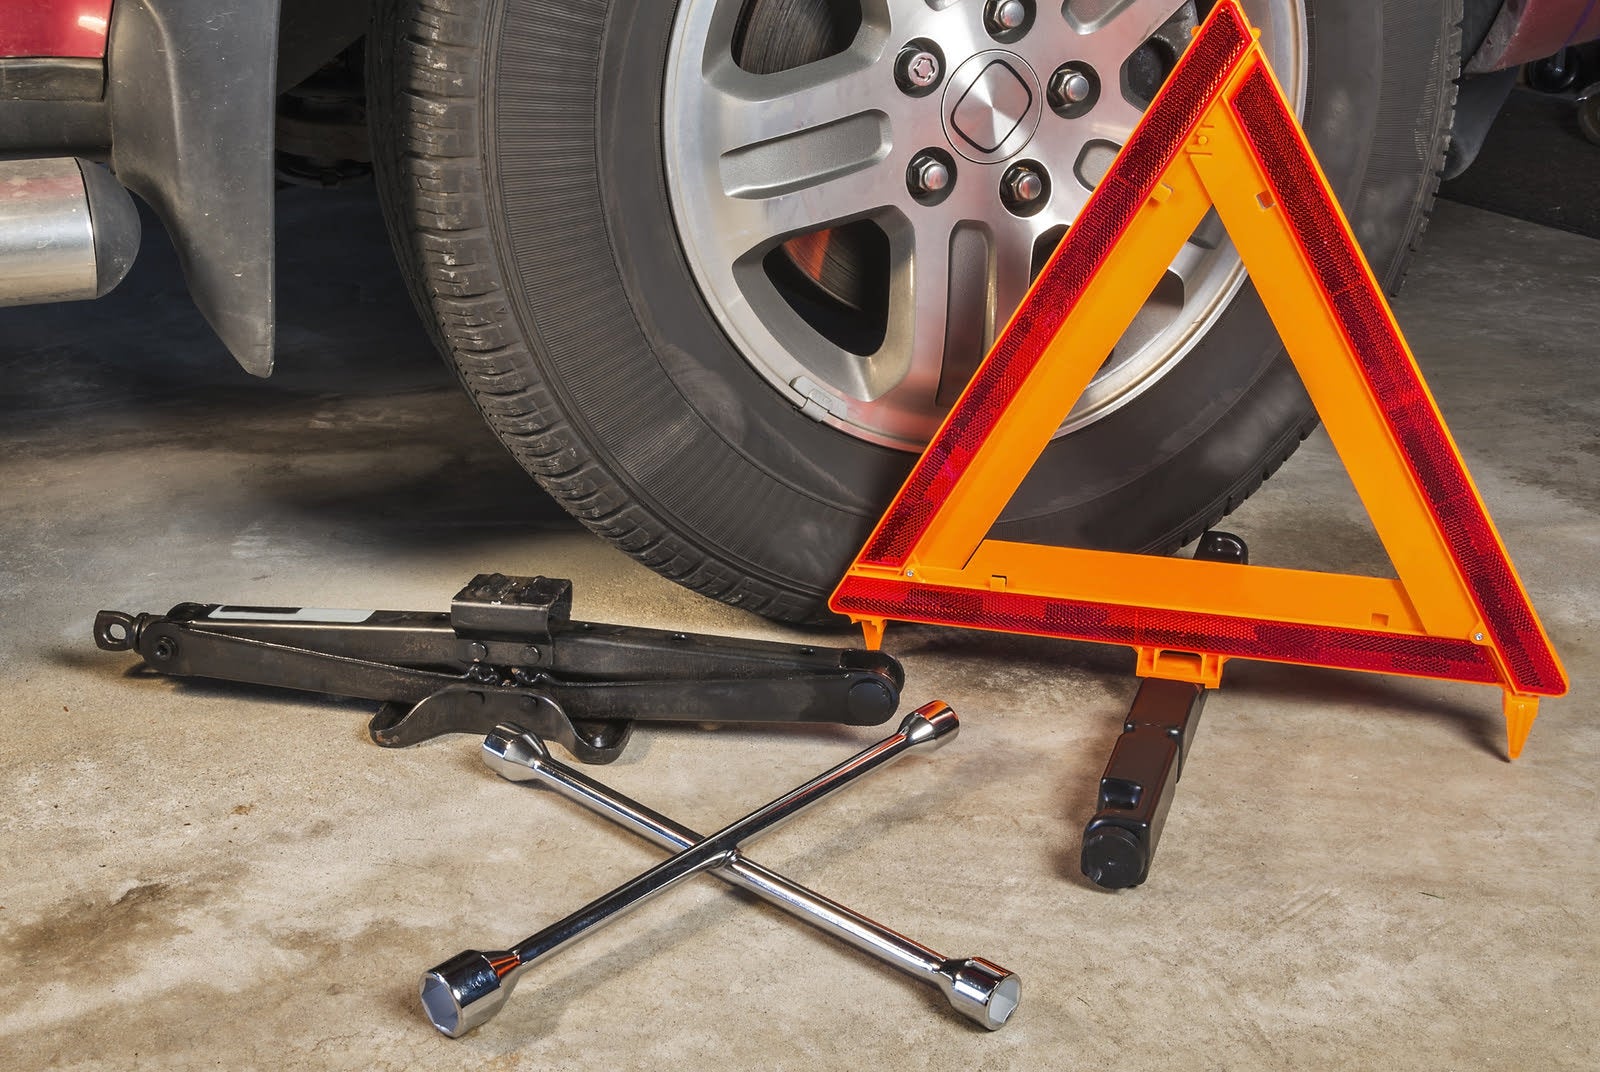
You need only a few tools to change a tire, but they’re all essential. Among them are a jack, lug wrench, and the spare tire and wheel. These are in addition to an emergency kit with wheel chocks and flares or reflectors. We’d also recommend a good pair of work gloves that will keep your hands clean and provide better grip, a breaker bar useful for loosening especially tight lug nuts, and a torque wrench that will help you ensure those lug nuts are properly fastened once you’ve changed the tire. Torque specifications can usually be found in your owner’s manual.
3. Prepare to Remove the Wheel
With the vehicle securely chocked, use the lug wrench to loosen the lug nuts. Some cars have hubcaps or wheel covers that must first be removed by pulling or prying them off with the sharp end of the lug wrench, and others have special locking lug nuts that require use of a “key” that must be attached to the lug wrench. That’s essentially an adapter that prevents any random passerby with a lug wrench from removing and stealing your wheels. Of course, without it you won’t be removing that wheel either, so make sure you keep it in the vehicle.
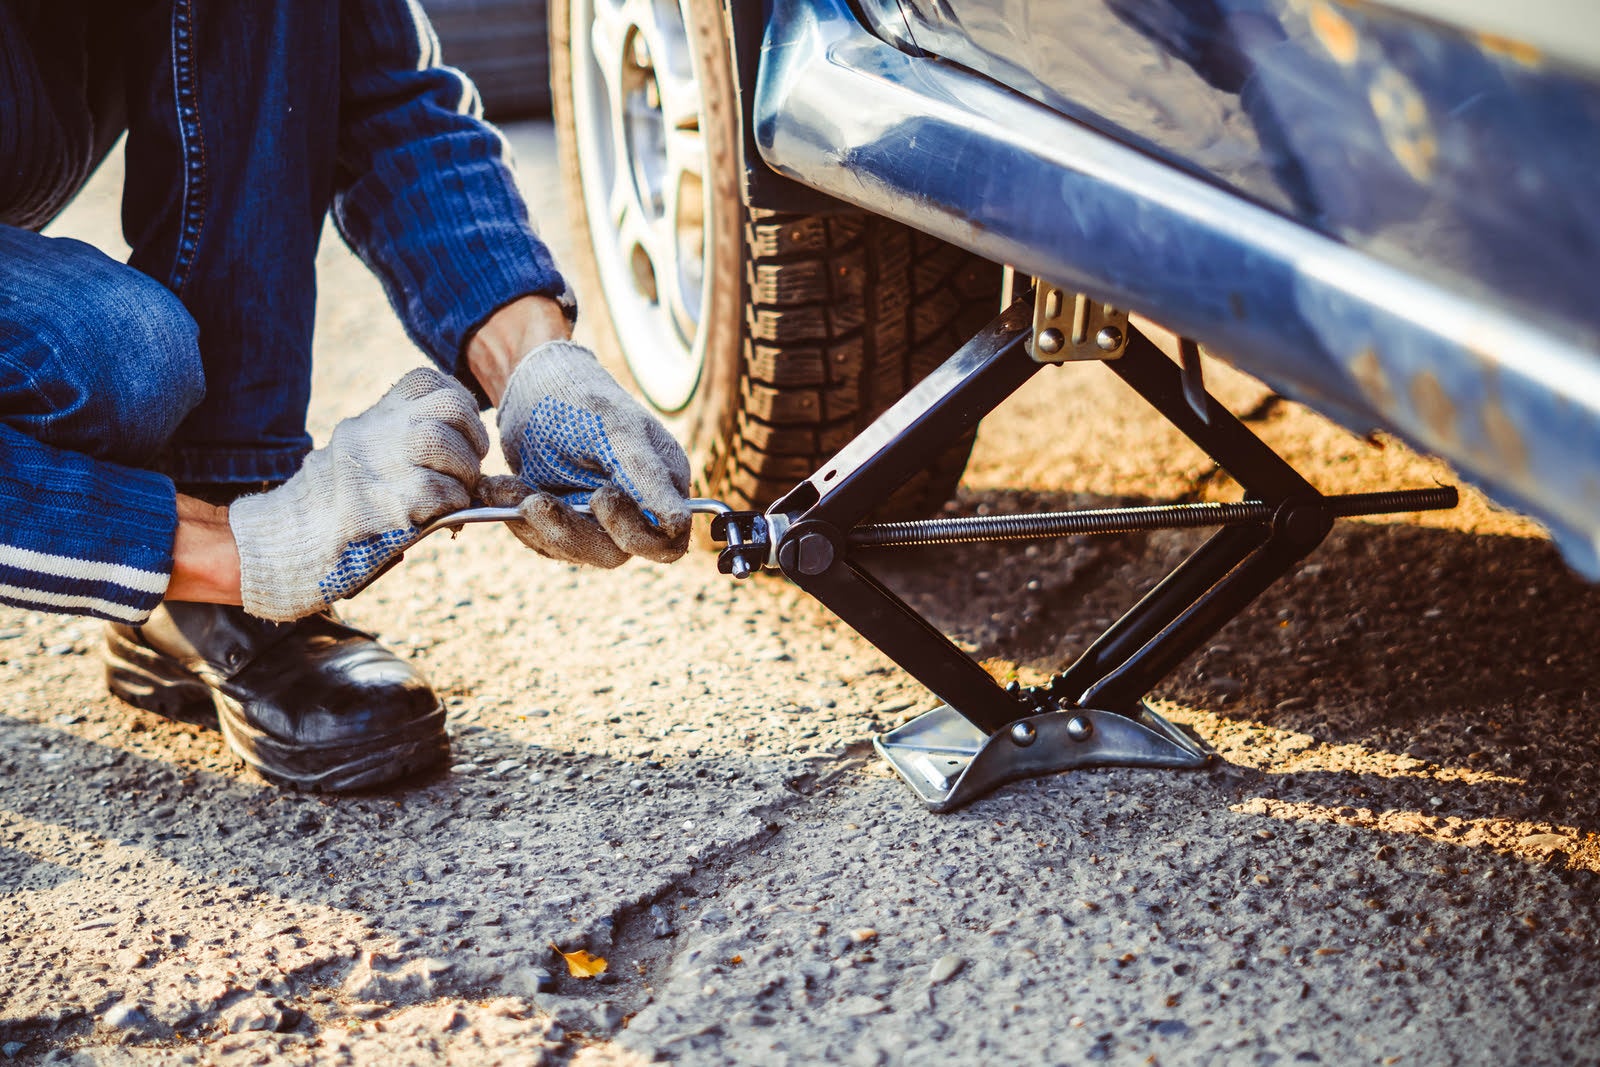
The next step is to raise the car using the jack, which is typically stored with the spare tire or within the car’s interior. Place the jack on level ground under a designated jack point. Typically, you'll be able to identify the jack point by a little notch or arrow on the vehicle's frame, just ahead of the rear wheels or behind the front wheels. Again, check the owner’s manual for further guidance. Insert the long section of the lug wrench into the jack, and then raise the car by turning or pumping the wrench (this differs depending on the type of jack used). Continue until the tire is no longer in contact with the ground.
4. Remove and Replace the Wheel

With the wheel now raised off the ground, remove the lug nuts, leaving the top nut for last to prevent the wheel from falling off. Remove the wheel and replace it with the new wheel. Reinstall the lug nuts, starting with the top and then working diagonally across the center of the wheel. Put another way, visualized as a clock, start with the nut at 12 o’clock, then 5 o’clock, then 10 o’clock, and so on.
Most cars today are fitted with a smaller "donut" tire, rather than a full-size spare tire. If this is the case for your vehicle, be sure to replace the donut with a full-size replacement as soon as possible. Non-full-size spares are safe to drive at lower speeds (typically less than 55 mph) for limited miles, but they aren't a true, suitable replacement.
5. Tighten the Lug Nuts

Once the lug nuts are back on the vehicle, tighten them by hand and then lower the jack by reversing the process that raised the car. With the new tire now resting on the ground, use the lug wrench to continue tightening the nuts in the same diagonal pattern described earlier. Finally, set the torque wrench to the torque specification outlined in your owner’s manual and finish tightening the lug nuts. When the wheel is secure, verify that the tire pressure matches the PSI figure listed in the owner’s manual or on the driver’s door jamb, and remember to reset the torque wrench to zero before storing it for future use.
The Bottom Line
Changing a tire isn’t all that difficult, and with 24-hour roadside assistance standard with most new cars, there’s only a slight chance you’ll ever need to tackle the job yourself. But if that time does come, you’ll now know how to safely and quickly get yourself—not to mention friends and family—up and running again.
Related Topics
What to Do When Your Car’s Air Conditioner Stops Working
The 10-Step Automotive Checklist for Summer Road Trips
What to Look for When Shopping for a First Car
Read More CarGurus Tips and Advice
Updated on: March 18, 2020