How do I get to the tail light bulb on the driver's side? Surely I don't have to remove the cabinets like my mechanic suggested.
After 100,000 miles I finally have a light bulb out...but the hardest to get to!
I just saw on the Yahoo! Eurovan Group how to get to those bulbs. You may join the group to get the details. But from what I remember, you take off that electrical panel and reach in with your right arm (sitting on a stool facing the left) . . . Good luck!
yes, remove fuse panel cover then plastic cover over whole of back on that side. This is a pain but the only way to gain enough access to light cluster. Removing cabinet isn't necessary however. light cluster held in place by plastic clips either side of unit.
Just did the 1995 euro-van tail light replacement today.And don't get in a hurry ,you have to take the cover off the electric panel ,I didn't remove any wires,just unplug the main power cord it gives you a few more inches of working room. There are 3 nuts 5/8 in to remove two on top and one on bottom ,like an upside down triangle ,and they are very tight to get to ,i used a t-handle with the socket attached.Then after they are removed ,there are two squeeze clips that you pull towards the inside and it will let you remove the lens, and the three bulbs, are right there.I do suggest replacing all three once its open just so you don't have to do it again.....have fun.
Thanks, it hasn't been much of a problem here in AK as I only use the van in the summer, these days, and it is pretty much 24 hours of light. But I do plan on doing all three next summer!
Thanks to EVERYONE for this solution. I followed the suggestions, got the cover of the electric panel moved and reached in with my "little" arm. All went well until I tried to get the new bulbs back into the holes (push and turn right)...I didn't realize there were TWO types of bulbs (actually it didn't matter since I dropped all the replacements into the cavity of the vehicle since I couldn't see what I was doing). But I was able to go to my dealership (they treat me really well) and a service tech helped put the bulbs in...it's fixed and I'm a happy "camper". Thanks to all of you!!!
The bulbs needed for my '93 eurovan were a 7506 (reverse bulb) and two 2057. The nubs on the 2057 are at different heights so take care seeding it properly. The first time I did it it wasn't in properly and I was lucky to try again before starting to dig for fuses.
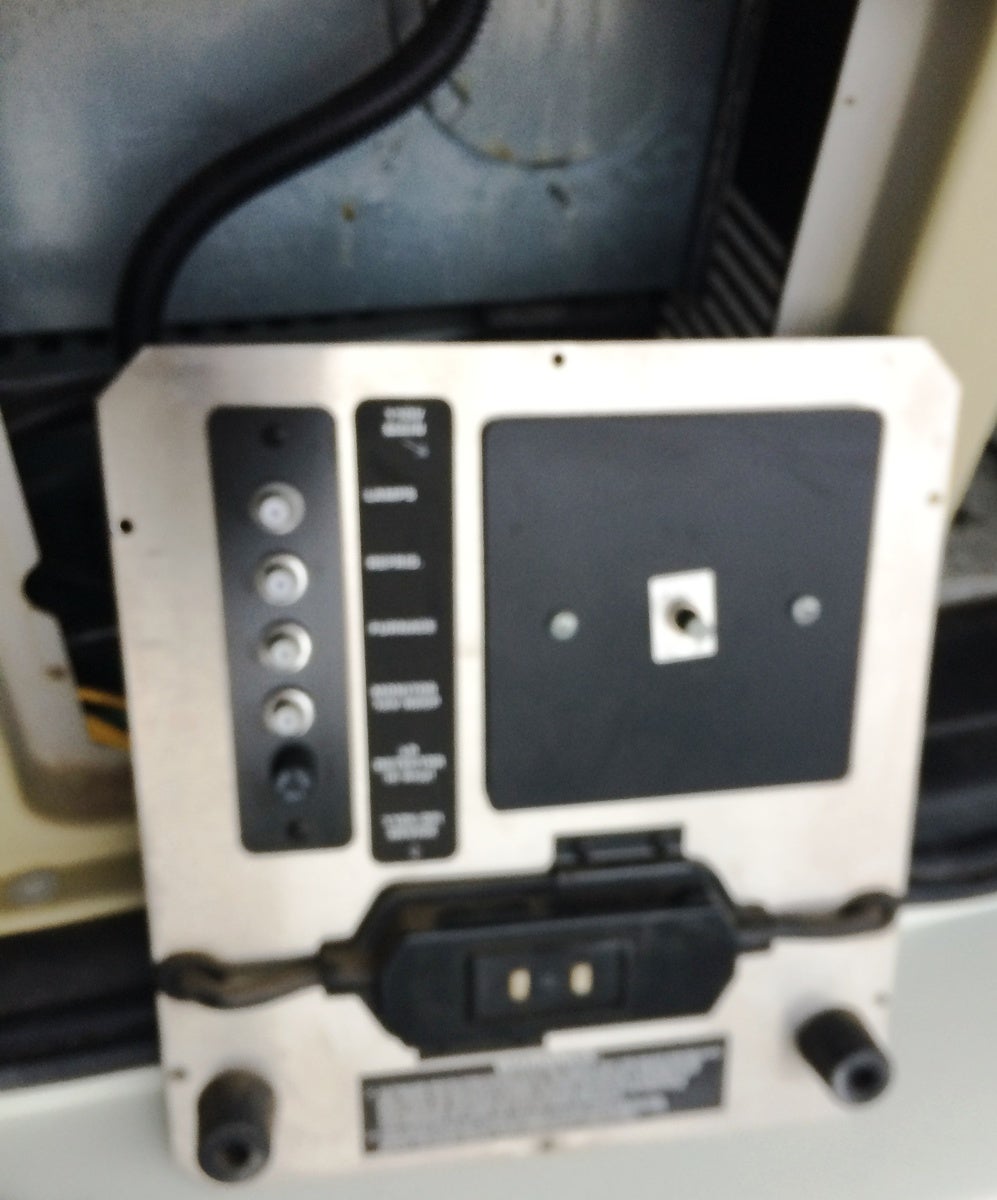
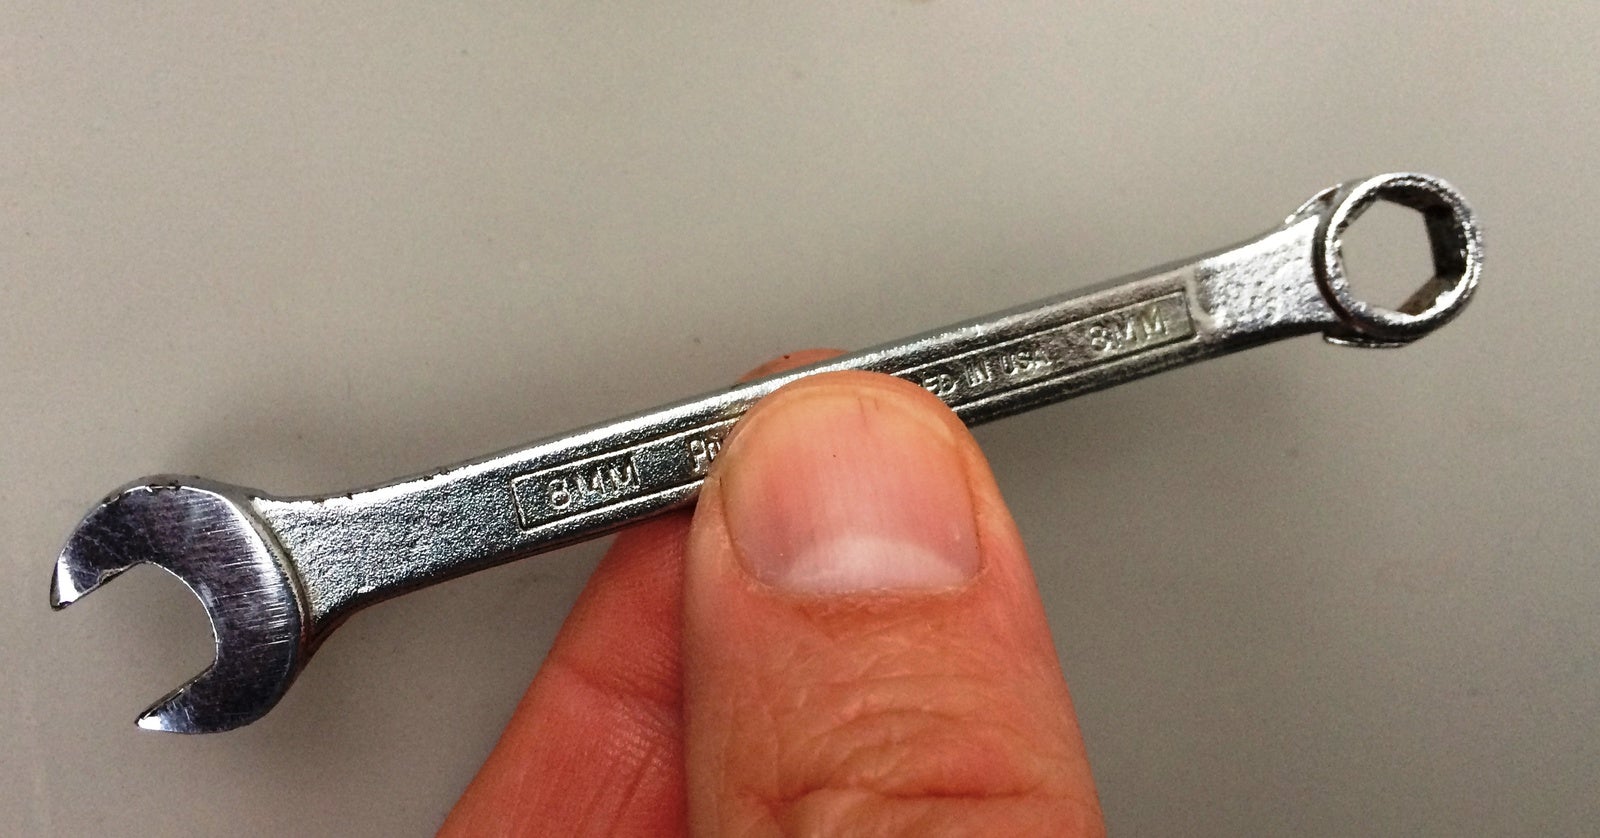
Feb 2018; 2002 Winnebago Eurovan Camper: Because it was cracked and a bulb was out, I needed to replace the driver's side tail light unit as well as the brake light bulb itself, and weirdly, my local dealer refused to do this work. Well, it's difficult but possible; here's what I did: 0) Bought a driver's side tail light unit, which costs about $75 and which has 3 protruding metric studs in a triangle, one on the bottom middle and two studs near the top, left and right; 1) Removed the six screws around the edge of the "power panel" in the back of the camper van, not unplugging anything, but just pulling it slightly out -- allowing me to get in there and reach over to the driver's side tail light unit, 2) Squeezed the ends of a horizontally-mounted electrical connector plug in the back of the tail light in order to unlock that plug, and then pulled it out -- don't worry, it is anchored and will hang right there in space; 3) Reached around and by feel, located each of the three studs. From there I used a tiny open-ended wrench (5/16" = 8 mm) to loosen each of the nuts -- DO THIS SLOWLY and carefully as you could drop the wrench (could attach it with a wristband?). There may not be enough room for a socket wrench depending on what kind you have; I could barely fit my fairly big hands anywhere in there. When a nut is loose, bring the wrench back out and set it down, then remove each nut CAREFULLY by hand. Or get ready to drop a few nuts down into the void: metric M5 .8 nuts are replacements, along with a small washer and some Loctite 242; I know this due to having dropped the original nut. 4) When the tail light unit is minus its three nuts, it still won't come out yet because it has three locking tabs which must be pushed back; this is not too difficult. From there the unit pops out, unplugged. 5) More easily-operated locking tabs unseat a "bulb mounting plate" which in my case had a lot of corrosion and required some wire brushing prior to the insertion of three new bulbs. (Such a pain, you want to replace all three at this time.) Two bulbs are of type 7506 and one is type 7528; it's clear where that two-conductor bulb should go. 6) Reinstall the "bulb mounting plate" into the tail light unit, then push the unit into the van. It would make sense to have plugged in the wire harness plug EXCEPT that those wires interfere with the bottom nut installation -- so I think it will be easier to reinstall the nut first, then reattach the wire harness after that bottom nut is in place. That's what I did. 7) Lots of careful suffering to reinstall those three nuts mostly by hand, with a very careful half or full turn to retighten using the open-ended or socket wrench. 8) Test the lights with a friend, and presuming they work, reinstall the "power panel" with its cheesy six screws. 9) Voila! Success!
Same guy again, just another photo (can't seem to post more than one at a time).

Cranky back with another picture.

Cranky again, another photo.

Still super Cranky, another photo:
Cranky, last photo.

Thanks a lot
